
Last updated November 18, 2026
 Metal roofing
 Architectural shingles
 Tile roofing
 GAF
 Owens Corning
 Flat & low-slope
Free roof inspection with deck photos before we talk money - GAF and Owens Corning certified installation
Specialty Roofing Troubleshooting: Common Problems and How to Fix Them
A blister on a foam roof and a blister on a modified bitumen roof look identical from twelve feet away. One requires a simple patch. The other may signal moisture already trapped under the surface, where a patch on top does nothing but seal the problem in. That gap between how a failure looks and what it actually means is where most roofing money gets wasted. In Henderson, we see it constantly: homeowners treating a symptom that reads one way and behaves another. This guide teaches you to match the symptom to the real failure mode, material by material, so you can tell a quick fix from a job that needs a trained eye before winter rains and summer heat finish the argument.
Quick Answer
Specialty roofing problems in Henderson usually trace back to four causes: thermal cycling, moisture trapped under a membrane, failed flashing at parapet walls, and movement in tile or foam systems that looks like damage but sometimes isn’t. Blistering, standing water, cracked tile, and lifted flashing each mean different things depending on the material, so the symptom alone never tells you the fix. Match what you see to the material before you spend a dollar.
Styles & brands we work with
- Architectural shingles
- Metal roofing
- Tile roofing
- GAF
- Owens Corning
- Flat & low-slope
Table of Contents
- The Symptom-to-Cause Matrix: What Each Sign Actually Means
- Why Henderson Tile Roofs “Walk” and When Movement Turns Structural
- Foam Roofs: Recoat Versus Remediation
- Parapet Wall Flashing Failures on Flat Roofs
- Standing Water and Ponding: Reading the Drainage Story
- When a DIY Patch Voids Your Warranty
- Building a Documentation Trail That Protects You
- Common Mistakes to Avoid
The Symptom-to-Cause Matrix: What Each Sign Actually Means
The same visible symptom points to different root causes depending on material. Before you call anyone, identify what your roof is made of and read the symptom against that material. This is where specialty roofing troubleshooting begins.
- Blistering on foam: Often a coating failure caused by trapped moisture or UV breakdown of the elastomeric layer. Usually a recoat candidate if the foam beneath is sound.
- Blistering on modified bitumen: Often moisture vapor driving up through the membrane from a wet substrate or a failed seam. A surface patch can trap the problem and make it spread.
- Standing water on flat roofs: A drainage or slope problem, not a membrane problem. Fixing the membrane without fixing drainage just buys time.
- Cracked or displaced concrete tile: Thermal cycling plus fastener fatigue. Movement is normal in small amounts; displacement with exposed underlayment is not.
- Lifted flashing at parapet walls: Adhesive or sealant failure at the wall-to-roof transition, the single most common leak point on flat residential roofs in Henderson.
Read the material first, then the symptom. A homeowner who skips that step tends to buy the wrong repair, and often pays for it twice.
Why Henderson Tile Roofs “Walk” and When Movement Turns Structural
Henderson’s swing from summer highs well past 100 degrees to cool desert nights causes concrete and clay tile to expand and contract daily. Tile laid on battens has a little room to move by design. Over a couple of decades, that daily flex lets individual tiles creep downhill, a phenomenon roofers call walking. A few millimeters a year adds up.
Normal walking looks like this:
- Tiles slightly out of alignment but still overlapping correctly
- No exposed underlayment visible between courses
- No ridge line distortion or sagging
Structural movement looks different:
- A visible sag or dip along the roof plane
- Tiles slipped far enough to expose the felt or underlayment beneath
- Ridge cap tiles separating from the field
- Movement that accelerated noticeably in a single season
Here is the sequence we recommend for homeowners trying to tell the two apart:
- Photograph the roof from the ground at a low angle, once in the morning and once in late afternoon heat. Compare tile lines.
- Look for any gap where the underlayment shows through. That is the threshold between cosmetic movement and a real moisture path.
- Check the ridge line for separation. Ridge failure usually means the field is under stress, not just settling.
- Note the pace. A roof that walked gradually over fifteen years is different from one that moved visibly in one summer.
If you’re seeing exposed underlayment or ridge separation, that’s the point to bring in a professional. Specialty Roofing in Henderson covers tile systems in detail, and a photo-documented inspection will tell you which side of the line you’re on.
Foam Roofs: Recoat Versus Remediation
Spray polyurethane foam roofs are common on Henderson homes built in the 1980s and 1990s, and they fail in a predictable order. The protective coating wears first. The foam underneath follows. Distinguishing a coating problem from a foam problem is the whole game, because one is a maintenance job and the other isn’t.
Ask three questions:
- Is the coating chalky, thin, or worn through in traffic areas? That points toward a recoat.
- Are there soft spots, spongy areas, or blisters that flex underfoot? That points toward moisture in the foam, which needs remediation before any new coating goes down.
- Is the surface intact but faded? UV fading alone is normal and doesn’t demand immediate action.
Recoating over foam that already holds moisture is one of the costliest mistakes we see. The new coating seals the moisture in, the sun heats it, and the blister returns bigger within a season. A proper recoat starts with a moisture reading and a surface inspection. If the foam is wet, that section gets cut out and rebuilt first, then coated.
On timing: recoating every 8 to 12 years is typical in Henderson’s climate, but sun exposure, foot traffic, and how the roof drains all pull that window in or push it out. A short walk with a moisture meter answers it faster than guessing.
Parapet Wall Flashing Failures on Flat Roofs
Many Henderson homes with flat or low-slope roofing have a parapet wall running along the perimeter, and the flashing where that wall meets the roof is the number one leak point we find. The reason is simple: that joint absorbs the full force of thermal expansion on two planes at once, and the sealant used there ages faster than anything else on the roof.
The common failures:
- Adhesive separation: The flashing pulls away from the wall as the membrane expands and contracts. Caulk over the gap gets you a season, maybe two.
- Rust or corrosion at metal counterflashing: Common where the metal is older and the coating has worn through.
- Missing or failed termination bar: The flashing edge works loose, letting water behind it.
- Debris trapping water at the wall base: Windblown dust and leaves build up, holding moisture against the flashing joint.
Proper repair means removing the old flashing, cleaning the substrate, and installing new flashing with the correct termination method, not smearing sealant over the top. Sealant is a maintenance item. Flashing is a system. When the system fails, patching the sealant is treating the symptom.
This is also where specialty roofing meets your warranty documentation. Improperly repaired parapet flashing can void a manufacturer warranty on the adjacent membrane. Roof Repair in Henderson walks through proper flashing repair and how it’s documented.
Standing Water and Ponding: Reading the Drainage Story
Standing water on a flat roof is a drainage problem showing up as a roofing problem. Water that sits more than 48 hours after rain is ponding. In our experience, the membrane usually holds up longer than the flashing around the pond, so ponding tends to announce itself as a leak somewhere else on the roof.
Diagnose in this order:
- Check the drains and scuppers for debris. The most common cause of ponding is a blocked drain.
- Look for low spots, called birdbaths, where the roof has settled over time. These collect water regardless of drainage condition.
- Check the slope toward the drain. A roof that drained correctly when new can lose pitch as the structure settles.
- Inspect the membrane at the pond edge. Blisters and seam failures often start there.
Fixing drainage may mean clearing debris, re-pitching a section during the next replacement, or adding a secondary drain. Fixing the membrane over standing water without addressing the water is a temporary patch with a short clock.
When a DIY Patch Voids Your Warranty
A homeowner who patches a repair themselves can unknowingly void the manufacturer warranty on the entire roof system. Manufacturer warranties from GAF and CertainTeed, for example, typically require installation and repair by authorized contractors. A patch applied by anyone else can void coverage on the section it touches, and sometimes on the whole roof.
DIY patches are reasonable in these cases:
- Clearing debris from a drain or scupper
- Replacing a single cracked tile with a matching spare, if you have one
- Applying approved sealant to a small, identified gap after inspection
DIY patches are risky in these cases, and we’d steer you to a professional:
- Any repair over a wet or suspect substrate
- Flashing repair at a parapet wall or penetration
- Any work on a roof under an active manufacturer warranty
- Anything involving walking on tile, where a wrong step cracks several tiles at once
A licensed contractor’s work comes with documentation the manufacturer recognizes. If you have a warranty on your roof, read the fine print before you buy a tube of sealant. The cost of a proper repair is usually far less than losing coverage.
Building a Documentation Trail That Protects You
If your goal is to make one repair and never revisit it, documentation matters as much as the work. A roof problem that returns in three years is a completely different conversation when you have photos from the original repair and a written workmanship guarantee.
What a good documentation trail includes:
- Date-stamped photos of the problem area before repair
- Photos of the repair in progress, showing materials used
- Photos of the finished area
- A written workmanship guarantee separate from the manufacturer warranty
- Material brand and product name on the invoice
We use photo documentation on every inspection because it protects the homeowner as much as the contractor. When Ridgeline Roofing Co. handles a specialty repair, the written 90-Day Done Right Promise backs the work: if it isn’t right, we come back and make it right, no arguing. That’s the piece most storm-chasing outfits don’t offer, because they aren’t planning to be in Henderson next spring. Our technicians have up to 10 years of experience and arrive background-checked and in uniform. The Ridgeline Roofing Co. Henderson home page explains how we document every inspection from your actual roof.
Common Mistakes to Avoid
- Patching a blister without identifying the material first. A foam blister and a modified bitumen blister look identical from the ground but require completely different repairs, and the wrong patch can seal moisture in.
- Recoating wet foam. Sealing a foam roof that already holds moisture traps it under the new coating, and the failure returns bigger within one Henderson summer.
- Smearing sealant over failed parapet flashing. This buys a season or two and hides the real problem, which is that the flashing system has failed and needs replacement, not a coating.
- Ignoring movement in a tile roof until underlayment is exposed. A few tiles walking is normal in Henderson’s heat; a visible gap between courses that shows the underlayment is the point to call.
- Repairing over standing water without fixing drainage. The membrane fails again, and usually the flashing fails first because water sits against it.
- Accepting a verbal workmanship guarantee. If it isn’t written down, it isn’t a guarantee. Storm-chasers are known for verbal promises and out-of-state phone numbers.
- Skipping documentation photos. Without date-stamped photos, a repeat repair becomes a dispute instead of a straightforward callback.
See the difference
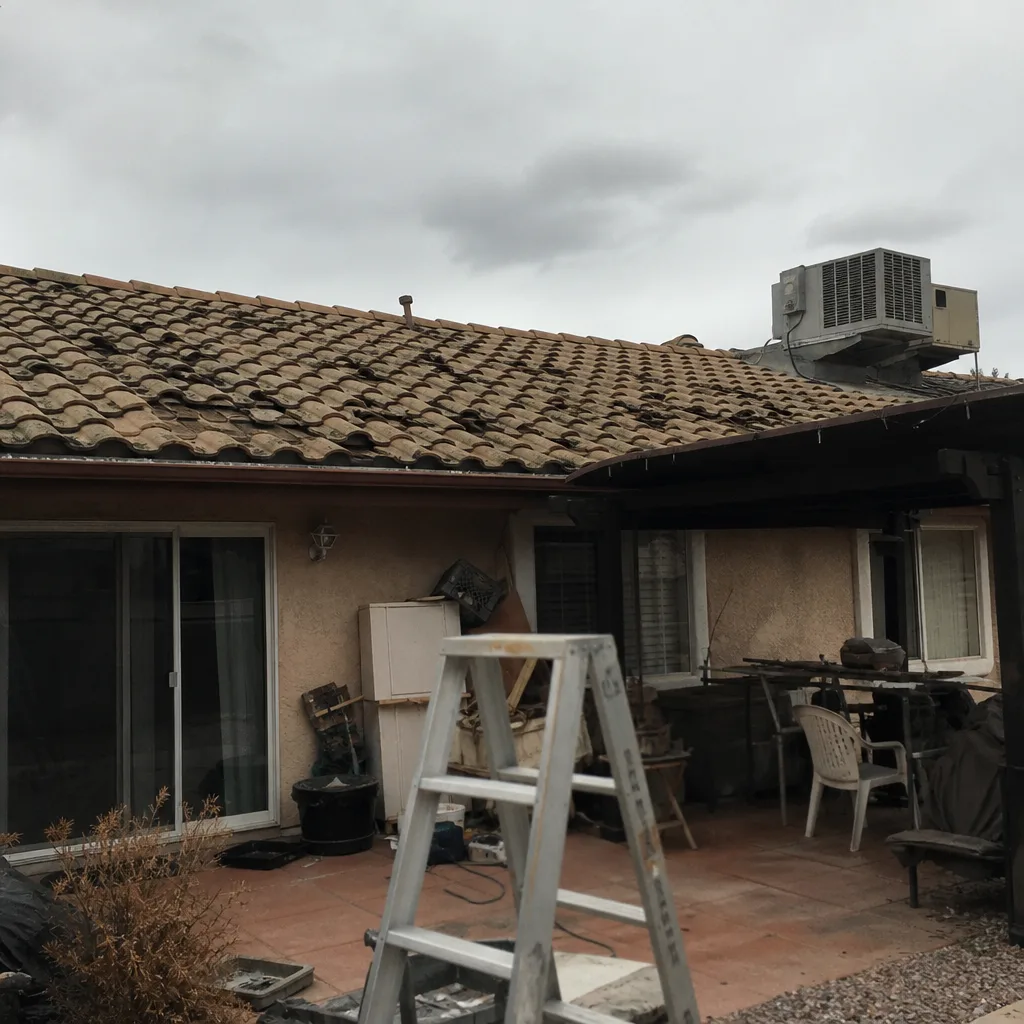 Before
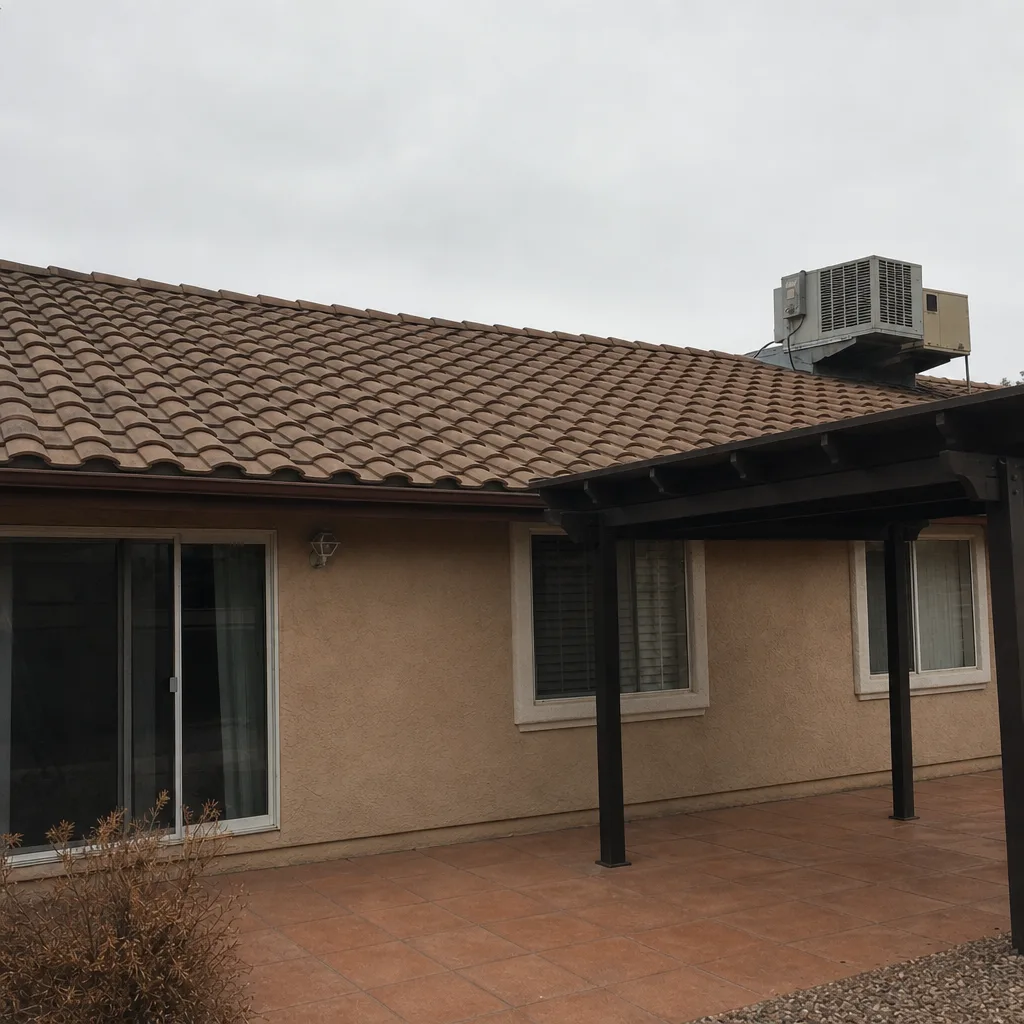 After
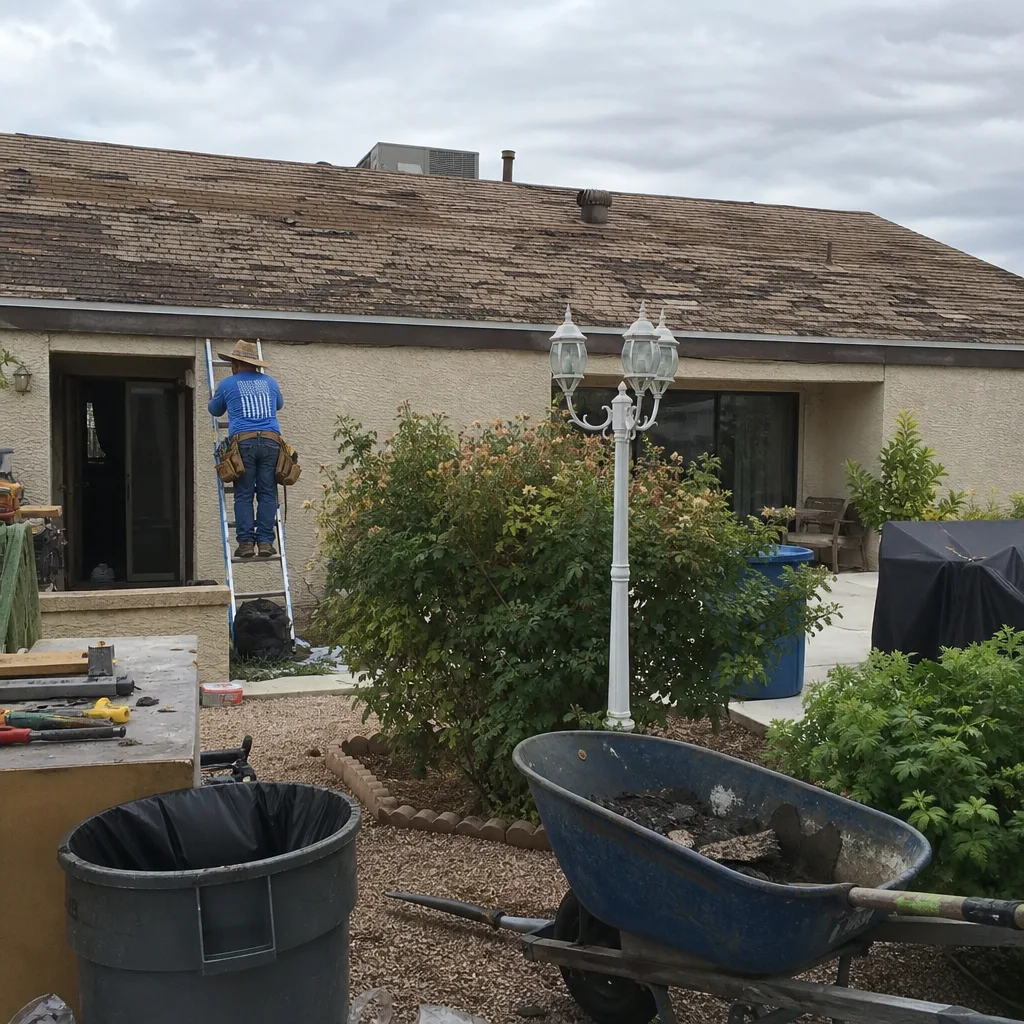 Before
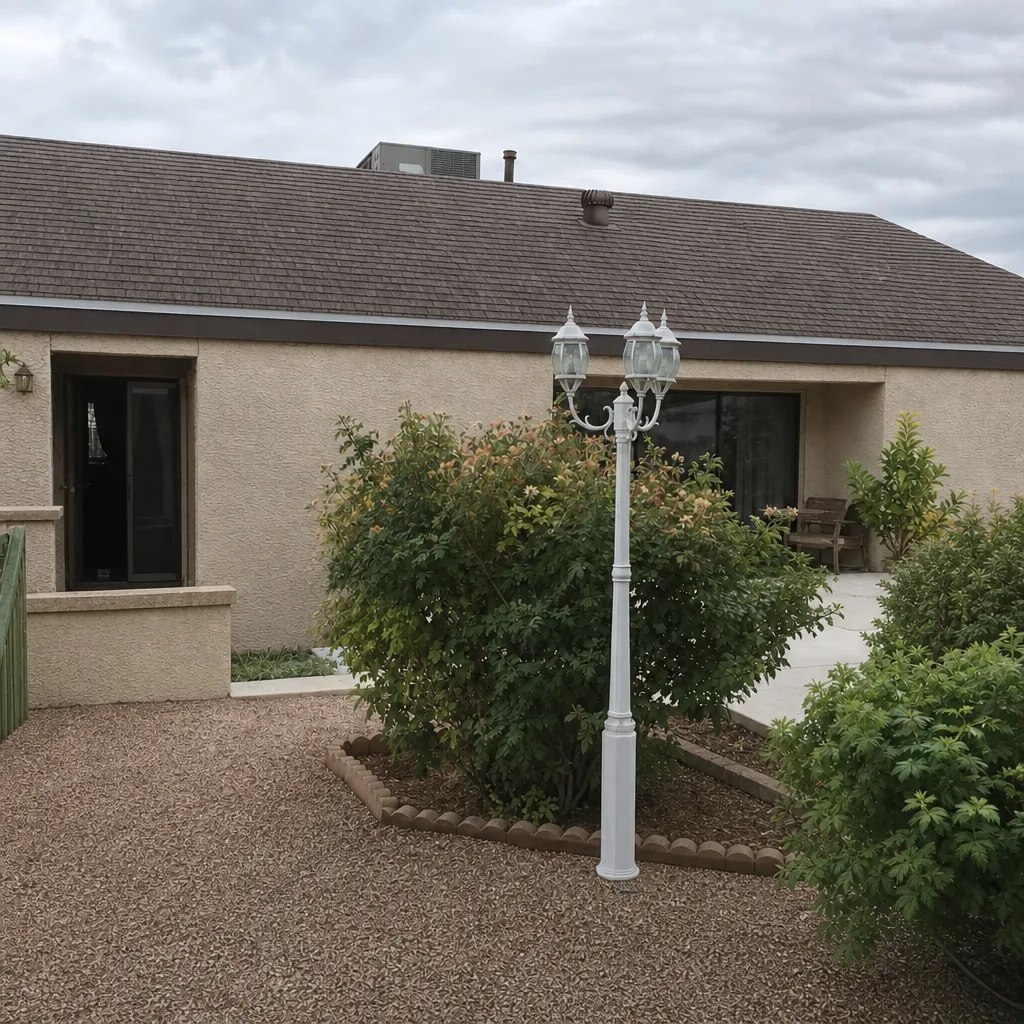 After
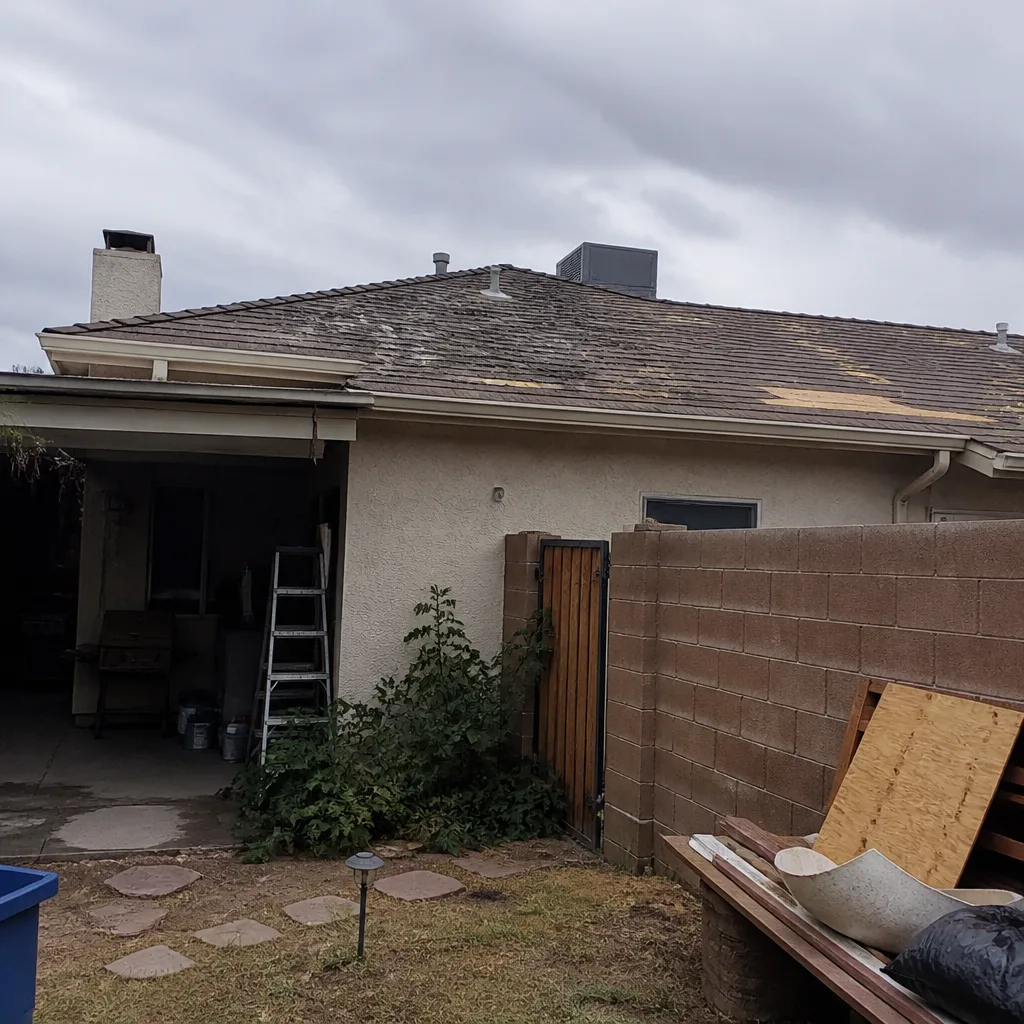 Before
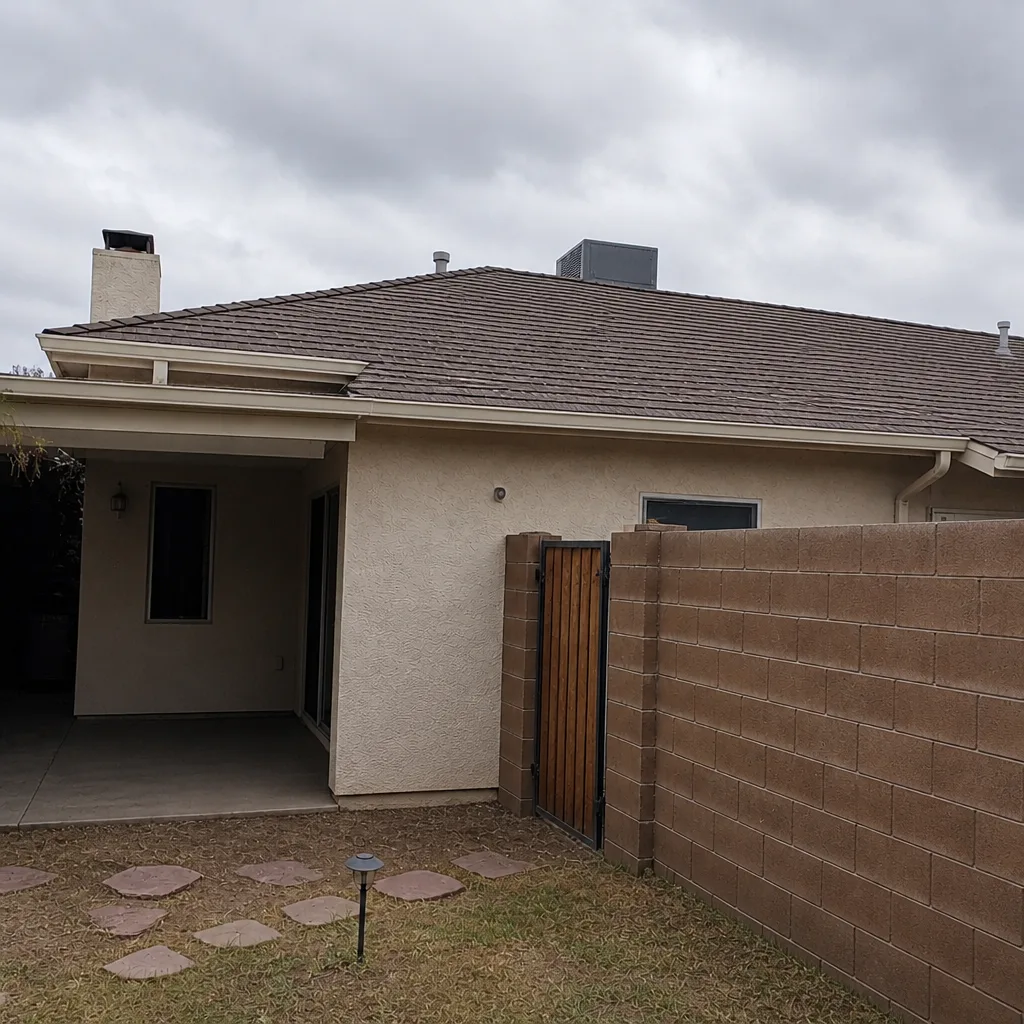 After
When to Call a Professional
Call us when any of these applies: exposed underlayment between tile courses; any blister on a flat or foam roof; standing water that persists more than 48 hours after a rain; flashing separation at a parapet wall; or any roof under an active manufacturer warranty. These are the symptoms where a wrong patch costs more than a proper repair. Specialty systems also deserve a trained eye: tile-on-batten, foam, and modified bitumen each have failure modes that look alike and aren’t.
Ridgeline Roofing Co. Henderson offers free estimates in Henderson and a free second opinion on any written estimate. Call (833) 691-6717. A live person answers every call, day or night.
Frequently Asked Questions
Most specialty troubleshooting inspections in Henderson run between $150 and $400, and if you proceed with the repair, that fee is often credited toward the job. The exact cost depends on the material, the roof height, and whether moisture testing is required. Call (833) 691-6717 for a free estimate, and the number on the estimate is the number on the invoice.
Usually not immediate, but it should be inspected within a week or two. A blister on foam is most often a coating failure, which is a recoat candidate if the foam below is dry. If the blister is soft or flexes underfoot, moisture is inside and remediation is needed before recoating. A quick inspection tells you which.
Tiles on battens creep slowly downhill over years of thermal cycling, a normal effect in Henderson’s climate. It becomes a problem when tiles slip far enough to expose the underlayment, when the ridge line separates, or when the pace accelerates in a single season. Exposed underlayment is the point to call.
Sometimes, but usually not on a roof under an active manufacturer warranty. GAF and CertainTeed warranties typically require authorized contractor repairs, and a homeowner patch can void coverage on the area it touches or in some cases the whole roof. Read the warranty before you buy sealant.
Pooling comes from either a blocked drain or a low spot in the roof deck. Both are drainage problems, not membrane problems. Left alone, ponding attacks the flashing first, then the seams. Clearing the drain and re-pitching a section during the next replacement are the durable fixes.
Yes, in most cases. Parapet flashing repair is a targeted job: remove the failed flashing, install new flashing with the correct termination method, and document the repair. It doesn’t require replacing the adjacent membrane unless the membrane itself has failed. For full-system questions, see Roof Replacement & Installation in Henderson. Call (833) 691-6717 for a free estimate.
The Bottom Line
Specialty roofing problems are rarely what they look like at first glance. Blistering means one thing on foam and another on modified bitumen. Tile movement is normal up to a point, then it isn’t. Ponding is a drainage story, not a membrane story. The fix for each depends on matching the symptom to the material and the real root cause, not on the cheapest patch at the hardware store. In Henderson, the sharp temperature swings, the parapet walls, and the age of the foam systems all push the same message: diagnose first, repair once, and get the work documented so a repeat repair is a conversation, not a dispute.
Call (833) 691-6717 for a free estimate. We have been serving local roofs since 1984 and we will be in town when the job needs checking on. Done right, and if it isn’t, we make it right.
Written by the team at Ridgeline Roofing Co. Henderson.